From Snapshots to Masterpieces: Your Guide to Mastering Photography as a Hobby
Ready to turn your casual snapshots into stunning photos? Learn how to master photography as a hobby with expert tips, gear advice, and creative techniques.
Table of Contents
- Introduction
- Choosing Your First Camera (Doesn't Have to Be Expensive!)
- Understanding the Exposure Triangle (ISO, Aperture, Shutter Speed)
- Learning Composition Basics (Rule of Thirds and Beyond)
- Finding Your Photographic Style (What Do You Love to Shoot?)
- The Magic of Light (Using Natural and Artificial Light)
- Post-Processing Essentials (Editing Your Images)
- Practice, Practice, Practice (And Seek Feedback)
- Joining a Community (Learning from Others)
- Conclusion
- FAQs
Introduction
Ever looked at a photograph and felt truly moved, wondering how the artist captured such beauty or emotion? Maybe you've snapped pictures on your phone, enjoying the process, but feel there's a deeper level you haven't quite reached. If you're nodding along, you've come to the right place. This guide is designed to help you understand how to master photography as a hobby, transforming those everyday moments into compelling images. It's not about needing the fanciest gear or innate talent; it's about learning the principles, practicing consistently, and finding your unique creative voice.
Photography is an incredibly rewarding hobby. It encourages you to see the world differently, to notice the subtle play of light, the textures, the compositions hiding in plain sight. Whether you dream of capturing breathtaking landscapes, intimate portraits, dynamic street scenes, or the intricate details of the macro world, the journey starts with understanding the fundamentals. Forget the intimidating jargon for a moment; think of this as a friendly conversation, guiding you step-by-step. We'll cover everything from choosing your first camera (hint: you might already own it!) to the magic of editing, all while keeping it practical and, most importantly, fun. Ready to unlock your creative eye?
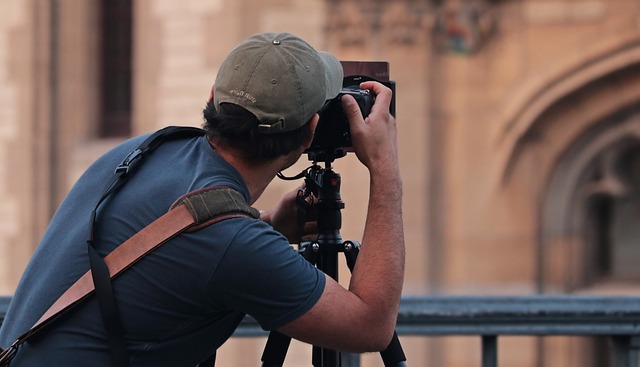
Choosing Your First Camera (Doesn't Have to Be Expensive!)
Let's tackle a common misconception right away: you don't need to break the bank to start your photography journey. Seriously! While professional photographers wield impressive (and often expensive) gear, the best camera for a beginner is often the one you already have or one that fits comfortably within your budget and willingness to learn. Today's smartphones boast incredibly capable cameras that are perfect for learning composition, understanding light, and even basic exposure controls. Think about it – photographers like Chase Jarvis famously built careers starting with phone cameras, proving it's more about the eye than the equipment.
Of course, if you're keen to delve deeper and have more manual control, you might consider an entry-level DSLR (Digital Single-Lens Reflex) or a mirrorless camera. DSLRs offer optical viewfinders (you see directly through the lens) and a vast array of compatible lenses, while mirrorless cameras are typically lighter, more compact, and feature electronic viewfinders. Brands like Canon, Nikon, Sony, and Fujifilm offer excellent beginner models. Don't get bogged down in "megapixel wars" or endless feature comparisons initially. Look for a camera that allows manual control over aperture, shutter speed, and ISO (we'll cover these next). Buying used or refurbished gear from reputable dealers like B&H Photo or Adorama can also be a fantastic way to save money.
The most crucial factor? Choose a camera you'll actually use. If a bulky DSLR feels intimidating and stays in its bag, it's not serving your hobby. A capable smartphone or a compact mirrorless camera that you carry everywhere might be far more beneficial for consistent practice. Remember, learning the principles of photography is transferable across devices. Gear acquisition can come later as your skills and specific interests develop. Focus on learning how to see and capture, not just on owning the latest gadget.
Understanding the Exposure Triangle (ISO, Aperture, Shutter Speed)
Okay, let's dive into the technical heart of photography: the Exposure Triangle. Sounds complex? It's actually a fundamental concept that, once grasped, gives you incredible creative control over your images. Imagine you're trying to fill a bucket (your camera's sensor) with the perfect amount of water (light). Too little, and the bucket isn't full (underexposed photo); too much, and it overflows (overexposed photo). The Exposure Triangle consists of three elements you can adjust to control how much light reaches the sensor: ISO, Aperture, and Shutter Speed. They all work together, so changing one often requires adjusting another to maintain the desired exposure.
Mastering these three controls is your ticket off "Auto" mode and into the driver's seat. When you control the exposure yourself (using Manual or semi-automatic modes like Aperture Priority or Shutter Priority), you dictate how your final image looks – whether you want a blurry background for a portrait, freeze fast action at a sports game, or capture the silky smooth motion of a waterfall. Renowned landscape photographer Ansel Adams was a master of exposure, meticulously calculating it to achieve the stunning tonal range in his black and white prints. While digital photography is more forgiving, understanding this interplay is key.
Let's break down each component:
- ISO (International Organization for Standardization): This measures your camera sensor's sensitivity to light. A low ISO (e.g., 100 or 200) means less sensitivity, ideal for bright conditions, resulting in cleaner images with less noise (graininess). A high ISO (e.g., 1600, 3200, or higher) increases sensitivity, allowing you to shoot in darker environments, but introduces more digital noise. Think of it as turning up the volume on the light signal.
- Aperture (f-stop): This refers to the size of the opening within your lens that lets light pass through. It's measured in f-stops (e.g., f/1.8, f/4, f/11). Confusingly, a smaller f-number (like f/1.8) means a wider opening, letting in more light and creating a shallow depth of field (blurry background – great for portraits). A larger f-number (like f/11 or f/16) means a smaller opening, letting in less light but keeping more of the scene in focus (ideal for landscapes).
- Shutter Speed: This is the duration for which the camera's shutter remains open, allowing light to hit the sensor. It's measured in seconds or fractions of a second (e.g., 1/1000s, 1/60s, 1s). A fast shutter speed (like 1/1000s) freezes motion but lets in less light. A slow shutter speed (like 1s) captures motion blur (think light trails or silky water) but lets in much more light, often requiring a tripod to prevent camera shake.
Learning Composition Basics (Rule of Thirds and Beyond)
So, you've got a handle on exposure – your photos are no longer too dark or too bright. Fantastic! But what makes an image truly captivating often lies in its composition: how the elements within the frame are arranged. Have you ever taken a photo where the subject is smack-dab in the center? While sometimes effective, it's often less dynamic than utilizing established compositional guidelines. These aren't rigid rules you must always follow, but rather tools to help create balance, interest, and guide the viewer's eye.
The most well-known guideline is the Rule of Thirds. Imagine dividing your frame into nine equal segments with two horizontal and two vertical lines. The Rule of Thirds suggests placing key elements of your scene along these lines or at their intersections (the "power points"). Placing a horizon on the top or bottom third line, or your main subject off-center at an intersection, often creates a more balanced and visually appealing image than centering everything. But don't stop there! Explore other techniques like leading lines (using roads, paths, or fences to draw the viewer's eye towards the subject), symmetry (creating balance with mirror images), framing (using elements like doorways or branches to frame your main subject), and using negative space (empty areas around your subject) to make it stand out.
Think about the work of masters like Henri Cartier-Bresson, famous for capturing the "decisive moment" with impeccable composition. Study photographs you admire. Ask yourself: where is my eye drawn first? How are the elements arranged? Don't be afraid to experiment. Crouch down low, climb up high, move left or right. A slight change in perspective can dramatically alter the composition and the story your photograph tells. The goal is to arrange the scene within your viewfinder intentionally, creating order and interest out of the visual chaos of the world.
Finding Your Photographic Style (What Do You Love to Shoot?)
As you practice the technical aspects and experiment with composition, you'll likely start gravitating towards certain subjects or themes. This is the beginning of developing your own photographic style – your unique way of seeing and interpreting the world through your lens. What truly excites you? Is it the grandeur of nature, the candid moments of street life, the controlled environment of a studio portrait, the tiny details revealed in macro photography, or something else entirely?
Don't feel pressured to specialize immediately. In fact, exploring different genres is crucial in the beginning. Shoot landscapes one weekend, try portraits of friends or family the next, experiment with capturing motion at a local event. Pay attention to what genuinely sparks your interest and holds your attention. Your style isn't just about what you shoot, but also how you shoot it – your preferred lighting, compositional tendencies, color palettes, and even your editing choices contribute to your unique voice.
Look at the work of photographers you admire, not to copy, but to understand what resonates with you. Is it the dramatic lighting in Annie Leibovitz's portraits? The raw emotion in Sebastião Salgado's documentary work? The vibrant colors in Steve McCurry's travel photography? Analyzing their work can provide inspiration and help you articulate what you want to achieve in your own images. Ultimately, your style will emerge naturally from consistent practice and shooting what you are passionate about. It's a journey of discovery, so embrace the exploration!
The Magic of Light (Using Natural and Artificial Light)
If the camera is the brush and the sensor is the canvas, then light is undoubtedly the paint. Photography literally means "drawing with light" (from the Greek words phos meaning light and graphê meaning drawing). Understanding and utilizing light is arguably the single most important skill in elevating your photography from simple snapshots to compelling images. It shapes your subjects, defines mood, creates texture, and directs the viewer's focus. Have you ever noticed how the same landscape can look drastically different at sunrise versus midday?
Natural light is your most accessible tool. Learn to observe its qualities at different times of day. The "golden hours" – shortly after sunrise and before sunset – offer warm, soft, directional light that is flattering for almost any subject. Midday sun, conversely, is harsh and creates strong overhead shadows, often less desirable unless used intentionally for dramatic effect. Overcast days provide soft, diffused light, like a giant softbox in the sky, perfect for portraits as it minimizes harsh shadows. Even indoor window light can be used beautifully for portraits and still lifes – experiment with positioning your subject relative to the window.
While natural light is fantastic, sometimes you need to supplement or create your own. This is where artificial light comes in, ranging from a simple built-in camera flash (often harsh, try diffusing or bouncing it if possible) to off-camera flashes, strobes, or continuous LED panels. You don't need a complex studio setup initially. Even a simple desk lamp positioned strategically can dramatically change the look of a small subject. The key is to observe how light interacts with your subject: notice the direction, intensity, color, and quality (hard vs. soft) and how these elements contribute to the overall mood and impact of your photograph.
Post-Processing Essentials (Editing Your Images)
In the days of film, photographers spent hours in the darkroom developing and printing their images, adjusting contrast and dodging or burning specific areas. In the digital age, post-processing software is the modern darkroom. Editing isn't about "fixing" bad photos or creating unrealistic scenes (though you can certainly do that!); it's primarily about enhancing what you captured, refining the exposure, adjusting colors, and optimizing the image to match your creative vision. Think of it as the final polish that brings out the best in your photograph.
You don't need to become a Photoshop wizard overnight. Start with the basics. Most editing software, even free mobile apps like Snapseed or desktop options like GIMP or RawTherapee, offer fundamental controls. Professional standards like Adobe Lightroom and Photoshop offer more power but come with a subscription cost. Regardless of the software, focus on learning subtle adjustments first. Cropping can improve composition, adjusting exposure and contrast can balance the tones, tweaking white balance ensures accurate colors, and adding a touch of saturation or vibrance can make colors pop (use sparingly!).
Shooting in RAW format (if your camera supports it) gives you much more flexibility in post-processing compared to JPEG, as it retains all the sensor data. It's like having the digital negative. Here are some key adjustments to explore:
- Exposure & Contrast: Fine-tuning the overall brightness and the difference between the darkest and brightest parts of the image. Often the first step in editing.
- Highlights & Shadows: Recovering detail in very bright areas (highlights) or brightening dark areas (shadows) without affecting the mid-tones as much as the main exposure slider.
- White Balance: Correcting color casts so that white objects appear truly white. Essential for accurate color reproduction. You can adjust temperature (blue/yellow) and tint (green/magenta).
- Color Adjustments (Saturation/Vibrance): Saturation boosts the intensity of all colors equally, while Vibrance is more subtle, primarily boosting muted colors while protecting skin tones. Less is often more here.
- Sharpening & Noise Reduction: Applying sharpening can enhance fine details (use carefully to avoid halos), while noise reduction smooths out the graininess often seen in high-ISO images.
Practice, Practice, Practice (And Seek Feedback)
You can read every book, watch every tutorial, and understand every technical concept, but nothing improves your photography like actually taking pictures. Consistency is key. Try to shoot regularly, even if it's just for a few minutes each day. Carry your camera (or use your phone) wherever you go. Challenge yourself with prompts or themes – "photograph something red," "capture reflections," "shoot using only a wide aperture." The more you practice, the more intuitive the technical settings become, and the better you'll get at seeing compelling compositions.
Don't be afraid to make mistakes! Every blurry photo, poorly exposed shot, or awkward composition is a learning opportunity. Analyze what went wrong. Was the shutter speed too slow? Did you misjudge the light? Was the focus point off? As the saying goes, "Your first 10,000 photographs are your worst," often attributed to Henri Cartier-Bresson. While perhaps an exaggeration, the sentiment holds true: mastery takes time and repetition.
Equally important as practice is seeking constructive feedback. It's easy to become attached to our own images, making it hard to see their flaws. Share your work with trusted friends, family, or better yet, other photographers. Join online forums, local camera clubs, or social media groups dedicated to photography critique. Learn to accept criticism gracefully – it's meant to help you grow. Ask specific questions: "How could I improve the composition here?" or "Does the editing feel natural?" Engaging with feedback accelerates your learning curve significantly.
Joining a Community (Learning from Others)
Embarking on the journey of mastering photography as a hobby doesn't have to be a solitary pursuit. In fact, connecting with fellow enthusiasts can be incredibly beneficial and motivating. Joining a photography community – whether it's a local camera club that meets in person or an online forum or social media group – opens doors to learning, inspiration, and camaraderie. You get to see how others approach similar subjects, learn new techniques, and get diverse perspectives on your own work.
Local clubs often organize photo walks, workshops, and competitions, providing structured opportunities to practice and learn in a supportive environment. Online communities, like subreddits (e.g., r/photography, r/photocritique), Flickr groups, or dedicated forums like DPReview, offer vast resources, tutorials, gear discussions, and platforms to share your images and receive feedback from photographers worldwide. Seeing the work of others can spark new ideas and push you to try different styles or techniques you might not have considered otherwise.
Beyond the technical learning, being part of a community fosters encouragement and accountability. Sharing your progress, celebrating small wins, and even commiserating over challenges with people who understand your passion can keep you motivated, especially when you hit inevitable plateaus. Don't underestimate the power of shared enthusiasm – it can transform a solitary hobby into a rich, social experience.
Conclusion
Embarking on the path to master photography as a hobby is an exciting adventure filled with continuous learning and creative discovery. It begins not necessarily with expensive gear, but with curiosity and a willingness to see the world differently. By understanding the fundamentals – the interplay of ISO, aperture, and shutter speed, the principles of composition, and the crucial role of light – you gain the power to move beyond simple snapshots and start crafting images with intention and impact.
Remember that finding your style, learning the art of post-processing, and consistently practicing are integral parts of the process. Don't shy away from mistakes; embrace them as lessons. Seek out feedback and connect with other photographers to accelerate your growth and stay inspired. More than anything, shoot what you love and enjoy the journey. Photography offers a unique way to document your life, express your creativity, and appreciate the beauty around you. So pick up your camera, step outside, and start capturing your masterpieces – this guide provides a solid foundation on your journey to master photography as a hobby.
FAQs
What's the best camera for a beginner hobbyist?
The best camera is often the one you have access to and will use regularly! Modern smartphones are excellent starting points. If you want more control, look into entry-level DSLRs or mirrorless cameras from reputable brands, focusing on models that offer manual controls (ISO, aperture, shutter speed) rather than just the highest megapixel count.
Do I really need to learn manual mode?
While Auto mode is convenient, learning Manual mode (or semi-automatic modes like Aperture/Shutter Priority) gives you full creative control over exposure and effects like depth of field and motion blur. It's highly recommended if you want to truly master the craft.
How important are megapixels?
For most hobbyist purposes, megapixel count isn't the most critical factor. Most modern cameras (even phones) offer sufficient resolution for viewing on screens and making reasonably sized prints. Lens quality, sensor size, and understanding light/composition have a greater impact on image quality.
Should I shoot in RAW or JPEG?
JPEGs are smaller, ready-to-use files processed in-camera. RAW files are larger and unprocessed, capturing more data from the sensor. Shooting RAW offers significantly more flexibility for editing (adjusting exposure, white balance, recovering details) and is generally preferred by those serious about post-processing.
How long does it take to get good at photography?
Mastery is a lifelong journey! However, you can see significant improvement within a few months of consistent practice and learning the fundamentals. Focus on understanding exposure, composition, and light, and practice regularly.
What are some good free photo editing software options?
For desktop, GIMP and RawTherapee are powerful free alternatives to Photoshop and Lightroom. For mobile editing, Snapseed (available on iOS and Android) is highly regarded and offers a wide range of tools.
Is expensive gear necessary to take great photos?
Absolutely not! While professional gear offers advantages in certain situations (low light, specific lens effects), understanding light, composition, and timing are far more important. A skilled photographer can create stunning images with basic equipment.
What is 'depth of field'?
Depth of field (DoF) refers to the range of distance within a photo that appears acceptably sharp. It's primarily controlled by the aperture (f-stop). A wide aperture (small f-number like f/1.8) creates a shallow DoF (blurry background), while a narrow aperture (large f-number like f/16) creates a deep DoF (more of the scene in focus).