DIY Home Repair Essentials: Basic Fixes Every Homeowner Should Know
Empower yourself! Learn essential DIY home repair basics every homeowner needs to tackle common household issues and save time and money.
Table of Contents
- Introduction
- Why DIY Matters: More Than Just Saving Money
- Tools of the Trade: Your Essential Toolkit
- Fixing Leaky Faucets: A Drip-Free Zone
- Unclogging Drains: Keeping Things Flowing Smoothly
- Patching Drywall: Erasing Nicks and Holes
- Silencing Squeaky Doors: Peace and Quiet Returns
- Fixing a Running Toilet: Stop Wasting Water
- Replacing Air Filters: Breathe Easier, Save Energy
- Hanging Items Securely: Beyond Just Nails
- Conclusion
- FAQs
Introduction
Owning a home is a fantastic journey, isn't it? It's a place of comfort, security, and making memories. But let's be honest, sometimes it feels like a never-ending To-Do list, right? From a dripping faucet that keeps you up at night to a squeaky door that announces your every move, small issues pop up constantly. While some problems definitely require a professional's expertise, many common household nuisances fall squarely into the "you can do this!" category.
That's where learning basic DIY home repair essentials comes in. It's not about becoming a master contractor overnight, but about gaining the confidence and knowledge to tackle those minor fixes yourself. Think of the satisfaction of a job well done, the money saved on service calls, and perhaps most importantly, preventing a small issue from escalating into a costly disaster. Ready to empower yourself and your toolbox?
Why DIY Matters: More Than Just Saving Money
Okay, let's talk frankly. Why bother learning how to fix a leaky faucet or patch a hole in the wall? Isn't it easier just to call a handyman? Sure, sometimes it is. But relying solely on professionals for every little thing can quickly drain your wallet. According to Angi's data, even minor plumbing repairs can cost hundreds of dollars. Learning basic DIY skills provides immediate financial benefits.
Beyond the savings, there's a sense of accomplishment that comes with fixing something yourself. It builds confidence and fosters a deeper connection with your home. Plus, being able to quickly address minor issues like a running toilet or a small paint scuff prevents them from becoming bigger problems down the line, saving you even more money and hassle in the long run. Isn't that peace of mind worth a little effort?
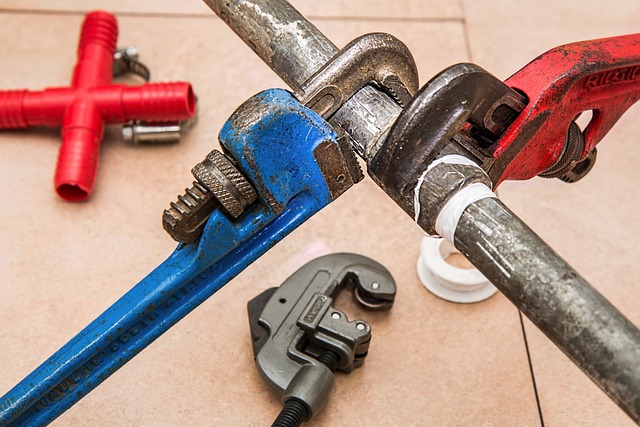
Tools of the Trade: Your Essential Toolkit
You don't need a workshop filled with expensive power tools to get started with basic home repairs. A relatively small collection of fundamental hand tools will see you through most common tasks. Think of these as your indispensable companions in the world of DIY. Having the right tool for the job not only makes the work easier but also safer and more effective. Trying to hammer a nail with the handle of a screwdriver? Been there, done that, not recommended!
Building your toolkit is a gradual process. Start with the absolute basics and add tools as you encounter new projects or feel more comfortable. Investing in decent quality tools is often worth it; they'll last longer and perform better than the cheapest options available. Consider browsing home improvement store websites or checking out beginner DIY guides for recommended starter kits.
- Screwdriver Set: Both Phillips head (cross-shaped) and flathead are crucial in various sizes. Look for a set with comfortable grips.
- Hammer: A standard claw hammer (16 oz is a good all-around size) for driving and removing nails.
- Adjustable Wrench: A versatile tool for tightening or loosening nuts and bolts of various sizes. Essential for plumbing fixes.
- Pliers: Needle-nose pliers (for gripping small objects in tight spaces) and channel-lock pliers (for gripping larger pipes or bolts) are very useful.
- Tape Measure: You'll need this for everything from hanging pictures to measuring for materials. A 25-foot tape measure is a good starting point.
- Utility Knife: Sharp and handy for cutting various materials like drywall tape, rope, or cardboard. Always use with caution!
- Safety Glasses/Gloves: Protecting your eyes and hands is non-negotiable for safety.
- Stud Finder: Helps you locate wall studs (the framing behind the drywall) crucial for securely hanging heavy items.
Fixing Leaky Faucets: A Drip-Free Zone
Drip... drip... drip. That sound can be maddening, can't it? And it's not just annoying; a leaky faucet wastes significant amounts of water over time, leading to higher water bills. Plus, constant moisture can damage your sink, countertop, and even the cabinet below. The good news? Fixing most common faucet leaks is a straightforward task, often involving replacing a worn-out washer, O-ring, or cartridge.
Before you start, identify the type of faucet you have (compression, ball, cartridge, or ceramic disk) and gather the necessary replacement parts. Always, *always* turn off the water supply to the faucet first – usually via shut-off valves located under the sink. A little research (thank goodness for online tutorials!) can guide you through disassembling your specific faucet model. It might seem intimidating at first, but with patience and the right tools (like that adjustable wrench!), you can silence that irritating drip for good.
Unclogging Drains: Keeping Things Flowing Smoothly
Slow drains or complete clogs are incredibly common household problems. In the bathroom, hair and soap scum are usually the culprits. In the kitchen sink, it's often grease and food particles. Ignoring a slow drain can lead to backups, unpleasant odors, and potential pipe damage. Thankfully, before you reach for harsh chemical drain cleaners (which can be bad for your pipes and the environment), there are effective DIY methods to try.
A plunger is your first line of defense. Ensure you have a good seal around the drain opening and plunge vigorously. For kitchen sinks with a garbage disposal, never put your hand down the drain; instead, try running the disposal with cold water and a few ice cubes, or use a plunger (with the other drain opening blocked). For stubborn clogs, a drain snake (or auger) can be inserted into the drain to break up or retrieve the blockage. These tools are relatively inexpensive and far safer than corrosive chemicals.
Patching Drywall: Erasing Nicks and Holes
Accidents happen. Moving furniture, door handles swinging too hard, or simply a misplaced step can result in nicks, dents, or even small holes in your drywall. While a large hole might require a more complex repair, patching smaller damage is definitely within the scope of a beginner DIYer. It's a satisfying process that restores the smooth, clean look of your walls and prevents the damage from worsening.
- Assess the Damage: For small dents or nail holes, a little spackle might be enough. For larger holes (up to a few inches), you'll need a patch kit or a piece of drywall and tape.
- Gather Materials: You'll need spackle or joint compound, a putty knife, sandpaper (medium and fine grit), and potentially a drywall patch or tape.
- Apply and Smooth: Apply the spackle or compound in thin layers, spreading it smoothly over the damaged area with the putty knife. Feather the edges so the patch blends into the wall.
- Sand and Repeat: Let each layer dry completely (drying time varies), then sand lightly to smooth. Apply a second coat if needed, especially for larger patches. Sand one final time until the surface is seamless with the surrounding wall.
- Prime and Paint: Once perfectly smooth and dust-free, prime the patched area to seal it, then paint to match your wall color. Stand back and admire your smooth, flawless wall!
Silencing Squeaky Doors: Peace and Quiet Returns
A squeaky door hinge is one of those small annoyances that can grate on your nerves every single day. It seems minor, but that constant screeching can really disrupt the tranquility of your home. Thankfully, this is one of the easiest DIY fixes out there, requiring minimal time, effort, and materials. You don't need special hinge grease; common household lubricants often do the trick.
Start by identifying which hinge(s) are making the noise. You can often pinpoint it by opening and closing the door slowly. Grab a lubricant like WD-40, silicone spray, or even a bit of petroleum jelly or olive oil in a pinch. Apply the lubricant directly to the hinge pins (the part that rotates within the barrel). You might need to open and close the door a few times to help the lubricant work its way in. Wipe away any excess. Voila! Enjoy the sound of silence.
Fixing a Running Toilet: Stop Wasting Water
Is your toilet constantly running, sending water trickling into the bowl long after you've flushed? This isn't just annoying; it's a major water waster, potentially adding hundreds of dollars to your utility bill over a year. A running toilet is usually caused by an issue inside the tank, often related to the flapper valve or the fill valve. Good news: these components are relatively inexpensive and easy to replace yourself.
Open the tank lid and observe what's happening. Is water constantly flowing into the overflow tube? Is the flapper (the rubber seal at the bottom of the tank) not seating properly? The most common culprit is a worn-out flapper that no longer creates a good seal. Turn off the water supply valve to the toilet (usually located on the wall behind or beside the toilet), flush the toilet to empty the tank, and then you can inspect and replace the flapper. Replacement flappers are universal or come in specific types, so take your old one with you to the store or check your toilet's model number. Replacing the flapper is usually a simple matter of unhooking the old one and attaching the new one.
Replacing Air Filters: Breathe Easier, Save Energy
Okay, this might not feel like a "repair," but it's a crucial piece of home maintenance that prevents bigger problems and significantly impacts your home's air quality and energy efficiency. Your HVAC system circulates air throughout your home, and the air filter catches dust, pollen, pet dander, and other particles. A clogged filter makes your system work harder, reduces its lifespan, drives up energy bills, and compromises your indoor air quality. It's such a simple fix with big payoffs.
Most homes have a return air vent with a filter grille. The filter size is usually printed on the side of the filter itself (e.g., 16x25x1 inches). Check your filter monthly and replace it every 1-3 months, or more frequently if you have pets or allergies. Replacing it involves opening the filter grille (often with small clips or latches), sliding out the old filter, noting the direction of the airflow arrow on the new filter (it should point towards the furnace/air handler), and sliding the new one in. Close the grille, and you're done! It takes less than five minutes but makes a world of difference.
Hanging Items Securely: Beyond Just Nails
Want to hang a picture, a shelf, or maybe something heavier like a mirror? Simply hammering a nail into drywall might be sufficient for very lightweight items, but for anything with significant weight, you need a more secure method to prevent it from crashing down and damaging your wall (and the item!). Understanding how to use wall anchors or locate studs is essential for secure hanging.
Wall studs are the vertical framing members inside your walls, usually spaced 16 or 24 inches apart. They provide solid wood to screw into, offering maximum support. Use a stud finder to locate these. For areas between studs, wall anchors are your friend. There are various types – plastic expansion anchors, self-drilling anchors, toggle bolts – each suited for different weights and wall types. Plastic anchors are good for light to moderate weight (up to 10-20 lbs typically). Toggle bolts can support much heavier loads. Read the packaging to understand the weight rating and installation instructions for the specific anchors you choose. Taking a few extra minutes to hang something properly will save you the headache of repairs down the line.
Conclusion
See? Tackling basic home repairs isn't rocket science! While the thought of fixing things yourself might feel intimidating at first, starting with these simple tasks can build your confidence and skill set. From silencing a persistent drip and keeping your drains clear to patching holes and ensuring your air is clean, mastering these fundamental DIY home repair essentials empowers you as a homeowner. You'll save money, prevent small issues from becoming big ones, and gain a greater appreciation for your home and your own capabilities. So, grab that toolbox, watch a reputable tutorial if you need to, and give it a go. You've got this!
FAQs
What are the most essential tools for basic DIY home repair?
A good starter toolkit should include a set of screwdrivers (Phillips and flathead), a hammer, an adjustable wrench, pliers (needle-nose and channel-lock), a tape measure, a utility knife, safety glasses, and gloves. A stud finder is also highly recommended for hanging things securely.
How often should I replace my HVAC air filter?
Most standard filters should be replaced every 1-3 months. If you have pets, allergies, or live in a dusty area, you might need to replace it monthly. Check the filter regularly – if it looks dirty and clogged, it's time for a new one.
What's the easiest way to fix a squeaky door hinge?
Often, the easiest fix is lubrication. Apply a lubricant like WD-40, silicone spray, or even a small amount of petroleum jelly or cooking oil directly onto the hinge pins. Move the door back and forth to work the lubricant in.
Can I use chemical drain cleaners for a clog?
While chemical drain cleaners can sometimes work, they are harsh, potentially damaging to pipes (especially older ones), and bad for the environment. It's usually better to first try mechanical methods like plunging or using a drain snake.
How do I know if a repair is too complex for me to handle?
Know your limits. If a repair involves significant electrical work beyond changing a lightbulb, major plumbing leaks with high water pressure, structural issues, or anything you feel unsafe or unsure about, it's always best to call a qualified professional. Starting with simple, low-risk tasks is key.
What is a wall anchor used for?
Wall anchors are used to securely hang items on drywall when you cannot screw directly into a wall stud. They expand or grip the back of the drywall to provide a stronger point of attachment, capable of supporting more weight than just a nail or screw directly in drywall.