Your Ultimate Guide: How to Build a High-Performance Gaming PC
Ready to build a high-performance gaming PC? This comprehensive guide covers choosing components, assembly tips, and achieving ultimate gaming power. Start now!
Table of Contents
- Introduction
- Why Build Your Own Gaming Rig?
- Setting Your Budget and Gaming Goals
- Choosing the Brain: The CPU (Processor)
- The Graphics Powerhouse: Selecting Your GPU
- The Motherboard: Your PC's Foundation
- Memory Matters: RAM Essentials
- Storage Speed: SSDs vs. HDDs
- Powering Up: The Power Supply Unit (PSU)
- Keeping it Cool: Case and Cooling Solutions
- Assembly Time: Bringing It All Together
- Conclusion
- FAQs
Introduction
Ever dreamt of a gaming machine perfectly tailored to your needs, pushing frame rates to ludicrous speeds and rendering virtual worlds with breathtaking fidelity? While pre-built PCs offer convenience, there's a special kind of satisfaction, a deeper connection, formed when you build a high-performance gaming PC yourself. It might seem daunting, like assembling a complex puzzle, but trust me, it's more accessible than you think. This guide is designed to walk you through the process, from conceptualization to the triumphant first boot-up.
Why embark on this journey? Beyond the potential cost savings (though that's often a factor!), building your own PC gives you complete control over every single component. You choose the exact processor that fits your workload, the graphics card that demolishes your favorite games, and even the case that matches your aesthetic. It's an incredibly rewarding learning experience, empowering you with knowledge about the technology you use every day. Ready to dive in and craft your ultimate gaming beast? Let's get started.
Why Build Your Own Gaming Rig?
So, why go through the effort of selecting individual parts and assembling them when you could just buy a ready-made system off the shelf? It’s a valid question. For many enthusiasts, the answer lies in customization and value. Pre-built systems often come with compromises – maybe a powerful CPU is paired with a weaker GPU, or the power supply is just barely adequate. When you build, you dictate the balance. You prioritize what matters most to you, whether that's raw graphical power, lightning-fast loading times, or whisper-quiet operation.
Beyond component choice, building your own PC often yields better value for your money. System integrators need to make a profit, which means markups on parts and labor. By sourcing components yourself (especially during sales events) and doing the assembly, you can often build a more powerful machine for the same budget, or achieve your desired performance level for less cash. Plus, let's not forget the invaluable knowledge gained. Understanding how each component interacts demystifies the technology and makes future upgrades or troubleshooting significantly easier. It’s like learning to cook instead of always ordering takeout – you appreciate the final product more, and you gain a valuable skill.
Setting Your Budget and Gaming Goals
Before you even think about adding that shiny new graphics card to your online cart, let's talk brass tacks: budget and goals. How much are you realistically willing to spend? High-performance gaming PCs can range from roughly $800-$1000 on the entry-level side to well over $3000 for top-tier, no-compromise builds. Be honest with yourself about your financial limits. Remember to factor in peripherals like a monitor, keyboard, mouse, and the operating system (like Windows) if you don't already have them – these can add significantly to the overall cost.
Next, define your goals. What kind of gaming experience are you aiming for? Are you targeting smooth 1080p gameplay in popular esports titles, or do you crave glorious 4K resolution with all settings maxed out in demanding AAA games? What monitor resolution and refresh rate are you using (or planning to use)? A high-refresh-rate monitor (144Hz or higher) demands a more powerful PC to fully utilize it. Answering these questions is crucial because they directly influence component selection. There's no point overspending on a top-end GPU if you're only gaming at 1080p/60Hz, just as a budget CPU might bottleneck a powerful graphics card at higher resolutions. Think about longevity too – do you want a system that will last several years without major upgrades?
Choosing the Brain: The CPU (Processor)
The Central Processing Unit (CPU) is often called the "brain" of your computer, handling calculations, instructions, and managing tasks. For gaming, while the GPU usually takes center stage (more on that next), the CPU plays a vital supporting role. A weak CPU can bottleneck a powerful GPU, meaning the graphics card can't reach its full potential because it's waiting for the processor to feed it data. This is especially true at lower resolutions or in CPU-intensive games like real-time strategy titles or complex simulations.
The main battleground here is between Intel (Core i5, i7, i9 series) and AMD (Ryzen 5, 7, 9 series). Both offer fantastic gaming processors, and the "best" choice often shifts depending on current generations, pricing, and specific game benchmarks. Generally, look at core count and clock speed. For pure gaming, higher clock speeds and strong single-core performance have traditionally been very important, though modern games are increasingly utilizing more cores. A mid-range CPU like an Intel Core i5 or AMD Ryzen 5 often hits the sweet spot for most gamers, offering excellent performance without the premium price of the top-tier chips. Always check compatibility – your chosen CPU must match the socket type of your motherboard (e.g., LGA 1700 for recent Intel, AM4/AM5 for recent AMD).
- Core Count vs. Clock Speed: Higher clock speed generally boosts performance in older or less-threaded games, while more cores help with multitasking and modern, well-threaded games. A good balance is key.
- Intel vs. AMD: Both offer competitive options. Check current benchmarks (from reputable sources like Gamers Nexus or Hardware Unboxed) for the specific games and resolutions you target within your budget.
- Generational Leaps: Newer CPU generations almost always offer better performance and efficiency than older ones at similar tiers (e.g., a 13th Gen Intel i5 usually outperforms a 10th Gen i5 significantly).
- Socket Compatibility: Double-check that the CPU's socket type matches the motherboard's socket. They must align.
The Graphics Powerhouse: Selecting Your GPU
Alright, let's talk about the heart and soul of any high-performance gaming PC: the Graphics Processing Unit (GPU), or graphics card. This is the component that renders the stunning visuals, calculates complex lighting effects, and ultimately determines how smoothly your games run and at what graphical settings. For most gaming builds, the GPU will be the single most expensive component, and rightfully so – its impact on your gaming experience is immense.
The primary decision here is typically between NVIDIA (GeForce RTX series) and AMD (Radeon RX series). Both manufacturers produce excellent cards across various performance tiers. Key factors to consider include raw performance (measured in frames per second, or FPS, in benchmark tests), VRAM (video memory – crucial for high resolutions and textures), power consumption, and support for specific features like Ray Tracing (NVIDIA generally leads here) or AMD's FidelityFX Super Resolution (FSR). Your choice should align directly with your budget and gaming goals (resolution, refresh rate, desired visual fidelity). A powerful GPU like an RTX 4080/4090 or RX 7900 XTX is overkill for 1080p gaming but shines at 1440p or 4K.
- Match GPU to Monitor: Ensure your GPU can adequately drive your monitor's resolution and refresh rate. A high-end GPU is wasted on a low-spec monitor, and vice-versa.
- VRAM Matters: For 1080p, 8GB is often sufficient. For 1440p, aim for 10GB-12GB+. For 4K or heavy Ray Tracing, 16GB or more is becoming increasingly important.
- Check Benchmarks: Don't just rely on marketing names. Look up independent reviews and benchmark comparisons for the specific games you play. Websites like TechSpot, Tom's Hardware, and numerous YouTube channels provide excellent data.
- Power and Size: High-end GPUs consume significant power and can be physically large. Ensure your Power Supply Unit (PSU) can handle the load and that the card will fit inside your chosen PC case.
The Motherboard: Your PC's Foundation
Think of the motherboard as the central nervous system and skeleton of your PC. It's the main circuit board where all your expensive components connect and communicate with each other. While it doesn't directly impact FPS like the GPU or CPU, choosing the right motherboard is crucial for compatibility, stability, and future expansion potential. A poorly chosen motherboard can limit your component choices or bottleneck performance indirectly.
The first step is ensuring compatibility with your chosen CPU – this means matching the CPU socket (e.g., LGA 1700, AM5) and chipset (e.g., B760, Z790 for Intel; B650, X670 for AMD). Chipsets determine features like the number of PCIe lanes, USB ports, M.2 slots, and overclocking capabilities. Next, consider the form factor (size): ATX is the standard full-size, Micro-ATX is smaller with fewer expansion slots, and Mini-ITX is tiny, ideal for compact builds but often comes with compromises. Finally, look at features relevant to you: robust VRMs (Voltage Regulator Modules) for stable power delivery (especially if overclocking), sufficient RAM slots (usually 4), enough M.2 slots for fast SSDs, Wi-Fi/Bluetooth integration if needed, and the rear I/O port selection (USB types and quantity, audio jacks, etc.). Don't skimp here – a quality motherboard provides a stable base for your entire system.
Memory Matters: RAM Essentials
Random Access Memory (RAM) is your PC's short-term memory. It temporarily stores data that your CPU needs to access quickly, like running applications and game assets. Having enough RAM, and fast enough RAM, is essential for smooth multitasking and optimal gaming performance, preventing stutters and hitches, particularly in large open-world games or when running background applications.
For a modern high-performance gaming PC, 16GB (usually as a 2x8GB kit) is generally considered the minimum baseline. However, 32GB (2x16GB) is increasingly becoming the recommended sweet spot, offering more headroom for demanding titles and future-proofing your build. RAM speed (measured in MHz, like 3200MHz, 3600MHz, or even 6000+MHz for DDR5) and latency (CAS Latency or CL, lower is better) also impact performance, especially with AMD Ryzen CPUs. Always aim for a kit of two identical sticks (or four) to enable dual-channel mode, which significantly increases memory bandwidth compared to a single stick. Check your motherboard's specifications for supported RAM types (DDR4 or DDR5) and maximum speeds.
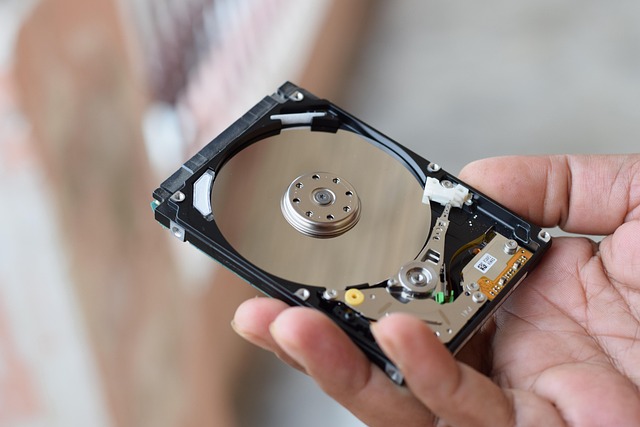
Storage Speed: SSDs vs. HDDs
Long gone are the days when slow, mechanical Hard Disk Drives (HDDs) were the primary storage for gaming PCs. While HDDs still offer vast amounts of storage capacity cheaply, their sluggish speed creates bottlenecks everywhere – from booting Windows to loading games and levels. For any performance-oriented build, a Solid State Drive (SSD) is non-negotiable for your operating system and frequently played games.
SSDs come in two main flavors: SATA and NVMe. SATA SSDs are significantly faster than HDDs and connect via a standard SATA cable. NVMe (Non-Volatile Memory Express) SSDs, however, are the current speed kings. They typically use the M.2 form factor and connect directly to a PCIe slot on the motherboard, offering drastically higher read/write speeds than even SATA SSDs. The difference is palpable in loading times and overall system responsiveness. A common strategy is to use a fast NVMe SSD (1TB or 2TB is a good starting point) for the OS, applications, and favorite games, potentially supplemented by a larger, cheaper SATA SSD or even an HDD for storing media files, documents, or less-played games.
- NVMe SSD (Recommended for OS/Games): Uses M.2 slot, offers the highest speeds (multiple GB/s). Look for reputable brands like Samsung, Crucial, WD Black, Sabrent.
- SATA SSD (Good for secondary storage/budget builds): Uses SATA port, significantly faster than HDD (around 550MB/s), available in 2.5-inch format.
- HDD (Bulk Storage): Uses SATA port, slowest option but offers the most capacity per dollar. Best reserved for media archives or games you rarely play.
- Capacity Needs: Modern games are huge! 1TB is often the minimum comfortable size for a primary gaming drive, with 2TB becoming increasingly popular.
Powering Up: The Power Supply Unit (PSU)
The Power Supply Unit (PSU) might not be the most glamorous component, but it's arguably one of the most critical. It takes AC power from your wall outlet and converts it into the stable DC voltages your delicate PC components need to operate. Skimping on the PSU is a recipe for disaster – an inadequate or low-quality unit can lead to system instability, random shutdowns, and even component damage.
Choosing the right PSU involves two main considerations: wattage and efficiency rating. Wattage indicates the maximum power the PSU can deliver. You need enough wattage to comfortably power all your components, especially the power-hungry CPU and GPU, with some headroom (around 20-30%) for potential spikes and future upgrades. Use online PSU calculators (like those from Cooler Master or Seasonic) to estimate your needs. Efficiency is indicated by the 80 Plus rating (Bronze, Silver, Gold, Platinum, Titanium), signifying how efficiently the PSU converts AC to DC power. Higher ratings mean less wasted energy (as heat) and often indicate better component quality and reliability. A good 80 Plus Bronze or Gold rated PSU from a reputable brand (like Corsair, Seasonic, EVGA, Cooler Master) is a solid investment for any high-performance build. Consider modularity (fully modular or semi-modular) for easier cable management.
Keeping it Cool: Case and Cooling Solutions
Your carefully selected components generate heat, especially the CPU and GPU when under load. Effective cooling is essential not just for preventing overheating and shutdowns, but also for maintaining peak performance, as components can throttle (slow down) if they get too hot. This involves choosing a suitable PC case and appropriate cooling solutions for your CPU and potentially other parts.
PC cases come in various sizes (matching motherboard form factors like ATX Mid-Tower, Micro-ATX, etc.) and designs. Prioritize cases with good airflow – look for mesh front panels, ample fan mounts, and smart internal layouts. Aesthetics matter too, of course, but don't sacrifice airflow for looks! For CPU cooling, you have two main options: air coolers (heatsinks with fans) and liquid coolers (All-In-One or AIO units with a radiator, pump, and fans). High-end air coolers (like those from Noctua or be quiet!) can rival the performance of many AIOs and are often simpler and more reliable. AIO liquid coolers can offer excellent performance, especially for heavily overclocked CPUs, and often have a cleaner look, but they introduce more potential points of failure (pump, leaks). Ensure your chosen cooler is compatible with your CPU socket and fits within your case.
Assembly Time: Bringing It All Together
Okay, the components are gathered, the excitement is building – it's time to assemble your masterpiece! This is where the magic happens, but it pays to be patient and methodical. Before you start, prepare your workspace: ensure it's clean, well-lit, and static-free (consider an anti-static wrist strap). Gather your tools – primarily Phillips head screwdrivers (magnetic tips are a lifesaver!), maybe some zip ties or Velcro straps for cable management, and your component manuals.
The general order usually involves installing the CPU, RAM, and M.2 SSD onto the motherboard before placing the motherboard into the case. Then, install the PSU, mount the motherboard, install the GPU, connect storage drives, and route all the power and data cables. Cable management isn't just for looks; good airflow depends on unobstructed pathways. Connecting the fiddly front panel connectors (power button, USB ports, audio jacks) can be tricky – consult your motherboard manual carefully! Don't force anything; components should generally slot into place smoothly. There are countless excellent video guides on YouTube (from channels like Linus Tech Tips, JayzTwoCents, Paul's Hardware) that demonstrate the entire process step-by-step. Take your time, double-check connections, and enjoy the process!
- Read the Manuals: Seriously, your motherboard and case manuals contain vital information specific to your hardware.
- Static Discharge: Ground yourself frequently by touching a metal part of the case (connected to the PSU, which is plugged in but switched off) or use an anti-static wrist strap.
- CPU Installation: Align the triangle/arrow marker on the CPU with the corresponding marker on the socket. Lower it gently; no force required. Secure the retention arm.
- RAM Installation: Open the clips on the RAM slots. Align the notch on the RAM stick with the notch in the slot. Push down firmly on both ends until the clips snap into place.
- Cable Management: Route cables behind the motherboard tray where possible. Use zip ties or Velcro straps to keep things tidy for better airflow and easier future maintenance.
Conclusion
Building a high-performance gaming PC is more than just assembling parts; it's about creating a personalized machine tailored precisely to your gaming ambitions. From carefully selecting the CPU and GPU that align with your goals and budget, to ensuring every component communicates harmoniously via the motherboard, the process empowers you with knowledge and results in a system you can truly call your own. While the journey might have a few small hurdles, the thrill of booting up your custom-built rig for the first time and seeing your favorite games run smoother and look better than ever before is incredibly rewarding.
Remember, research is your best friend. Component specifications and performance benchmarks change rapidly, so stay informed through reputable tech reviews and communities. Don't be afraid to ask questions and learn as you go. With patience, careful planning, and this guide as your starting point, you're well on your way to experiencing the ultimate satisfaction that comes when you build a high-performance gaming PC. Happy building, and even happier gaming!
FAQs
What tools do I absolutely need to build a PC?
Primarily, you need a Phillips head screwdriver (ideally with a magnetic tip). Other helpful items include zip ties or Velcro straps for cable management, wire cutters (for snipping zip ties), and an anti-static wrist strap to prevent static discharge damage.
How do I choose between Intel and AMD CPUs for gaming?
Both offer excellent gaming performance. Check current benchmarks for the specific price point and games you're interested in. Historically, Intel often had a slight edge in pure gaming, while AMD excelled in multitasking, but the lines are very blurry now. Price-to-performance is usually the deciding factor based on current deals and generations.
How much RAM do I really need for high-performance gaming?
16GB (2x8GB) is the minimum recommended for a good experience. However, 32GB (2x16GB) provides more headroom for demanding modern games, background tasks, and future-proofing, making it the ideal choice for most high-performance builds today.
Is liquid cooling necessary for a high-performance PC?
Not necessarily. High-end air coolers can provide excellent performance, often rivaling 240mm or even 280mm AIO liquid coolers, while being simpler and potentially more reliable. Liquid cooling (especially larger 360mm AIOs or custom loops) can offer superior cooling for heavily overclocked high-end CPUs or a cleaner aesthetic, but it's not strictly required for most builds.
What's the most common mistake first-time builders make?
Forgetting the I/O shield (the metal plate for the motherboard's rear ports) before installing the motherboard in the case is a classic! Other common issues include improper RAM installation (not fully seated or in the wrong slots for dual-channel), incorrect front panel connector wiring, and inadequate cable management hindering airflow.
Do I need to buy a Windows license?
Yes, for the full, unrestricted version of Windows, you'll need to purchase a license. You can install and use Windows without activation for a while, but it will have limitations (like personalization restrictions and a watermark). You can buy keys online from Microsoft or authorized retailers.
How long does it typically take to build a PC?
For a first-time builder, allow anywhere from 3 to 6 hours, taking your time and double-checking everything. Experienced builders might do it in 1-2 hours. Don't rush the process!
What do I do if the PC doesn't turn on after building?
Don't panic! Systematically check connections: Is the PSU switch on? Are all power cables (CPU, motherboard 24-pin, GPU) fully seated? Is the RAM properly installed? Are the front panel power switch connectors correctly wired to the motherboard? Consult your motherboard manual's troubleshooting section.